LS Miata Dry Sump Install - Day 2
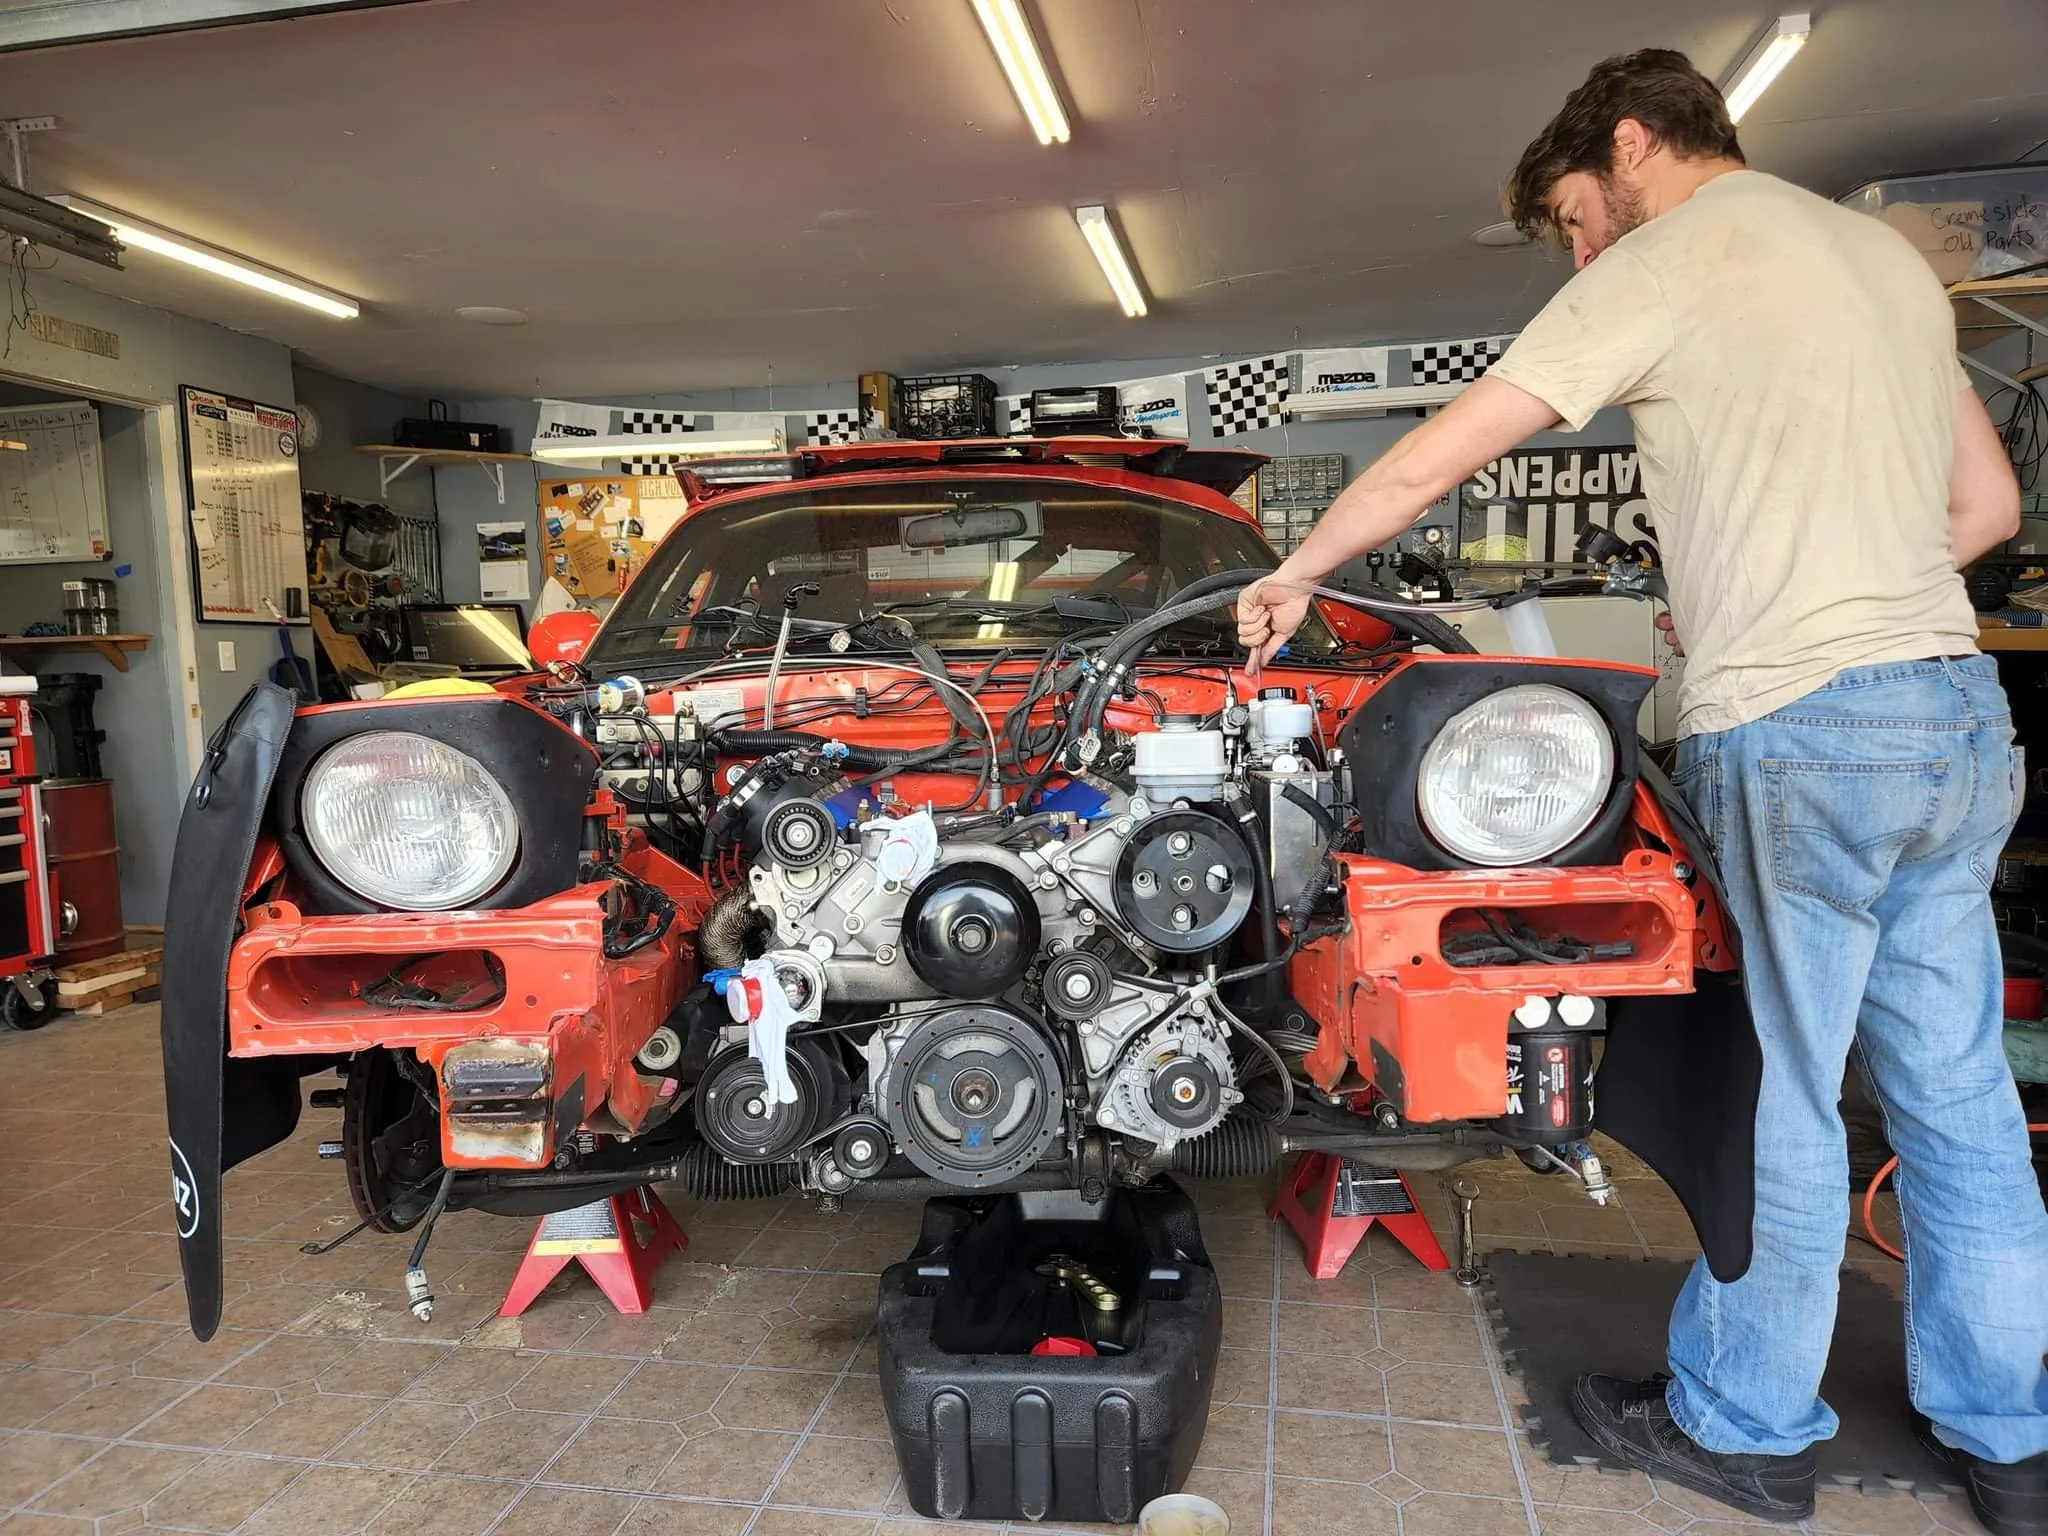
The story continues. Today is the day! Getting this LS3 out of the miata with elegance and ease.
Starting from yesterday, now I have daylight again and can open the shop door to use the hoist. ;-)
Checklist
Today is the easier task, double check all wiring is disconnected before starting to lower the assembly. Forget something and wonder why it won’t drop down. Look around only to find you forgot a pair of 14mm bolts holding everything. Remove then remember to always check everything twice.
Few things to remember:
Remove Shift Boot and Shifter
It is easy to leave the boot on shifter and just pull up to access the pair of 14mm bolts
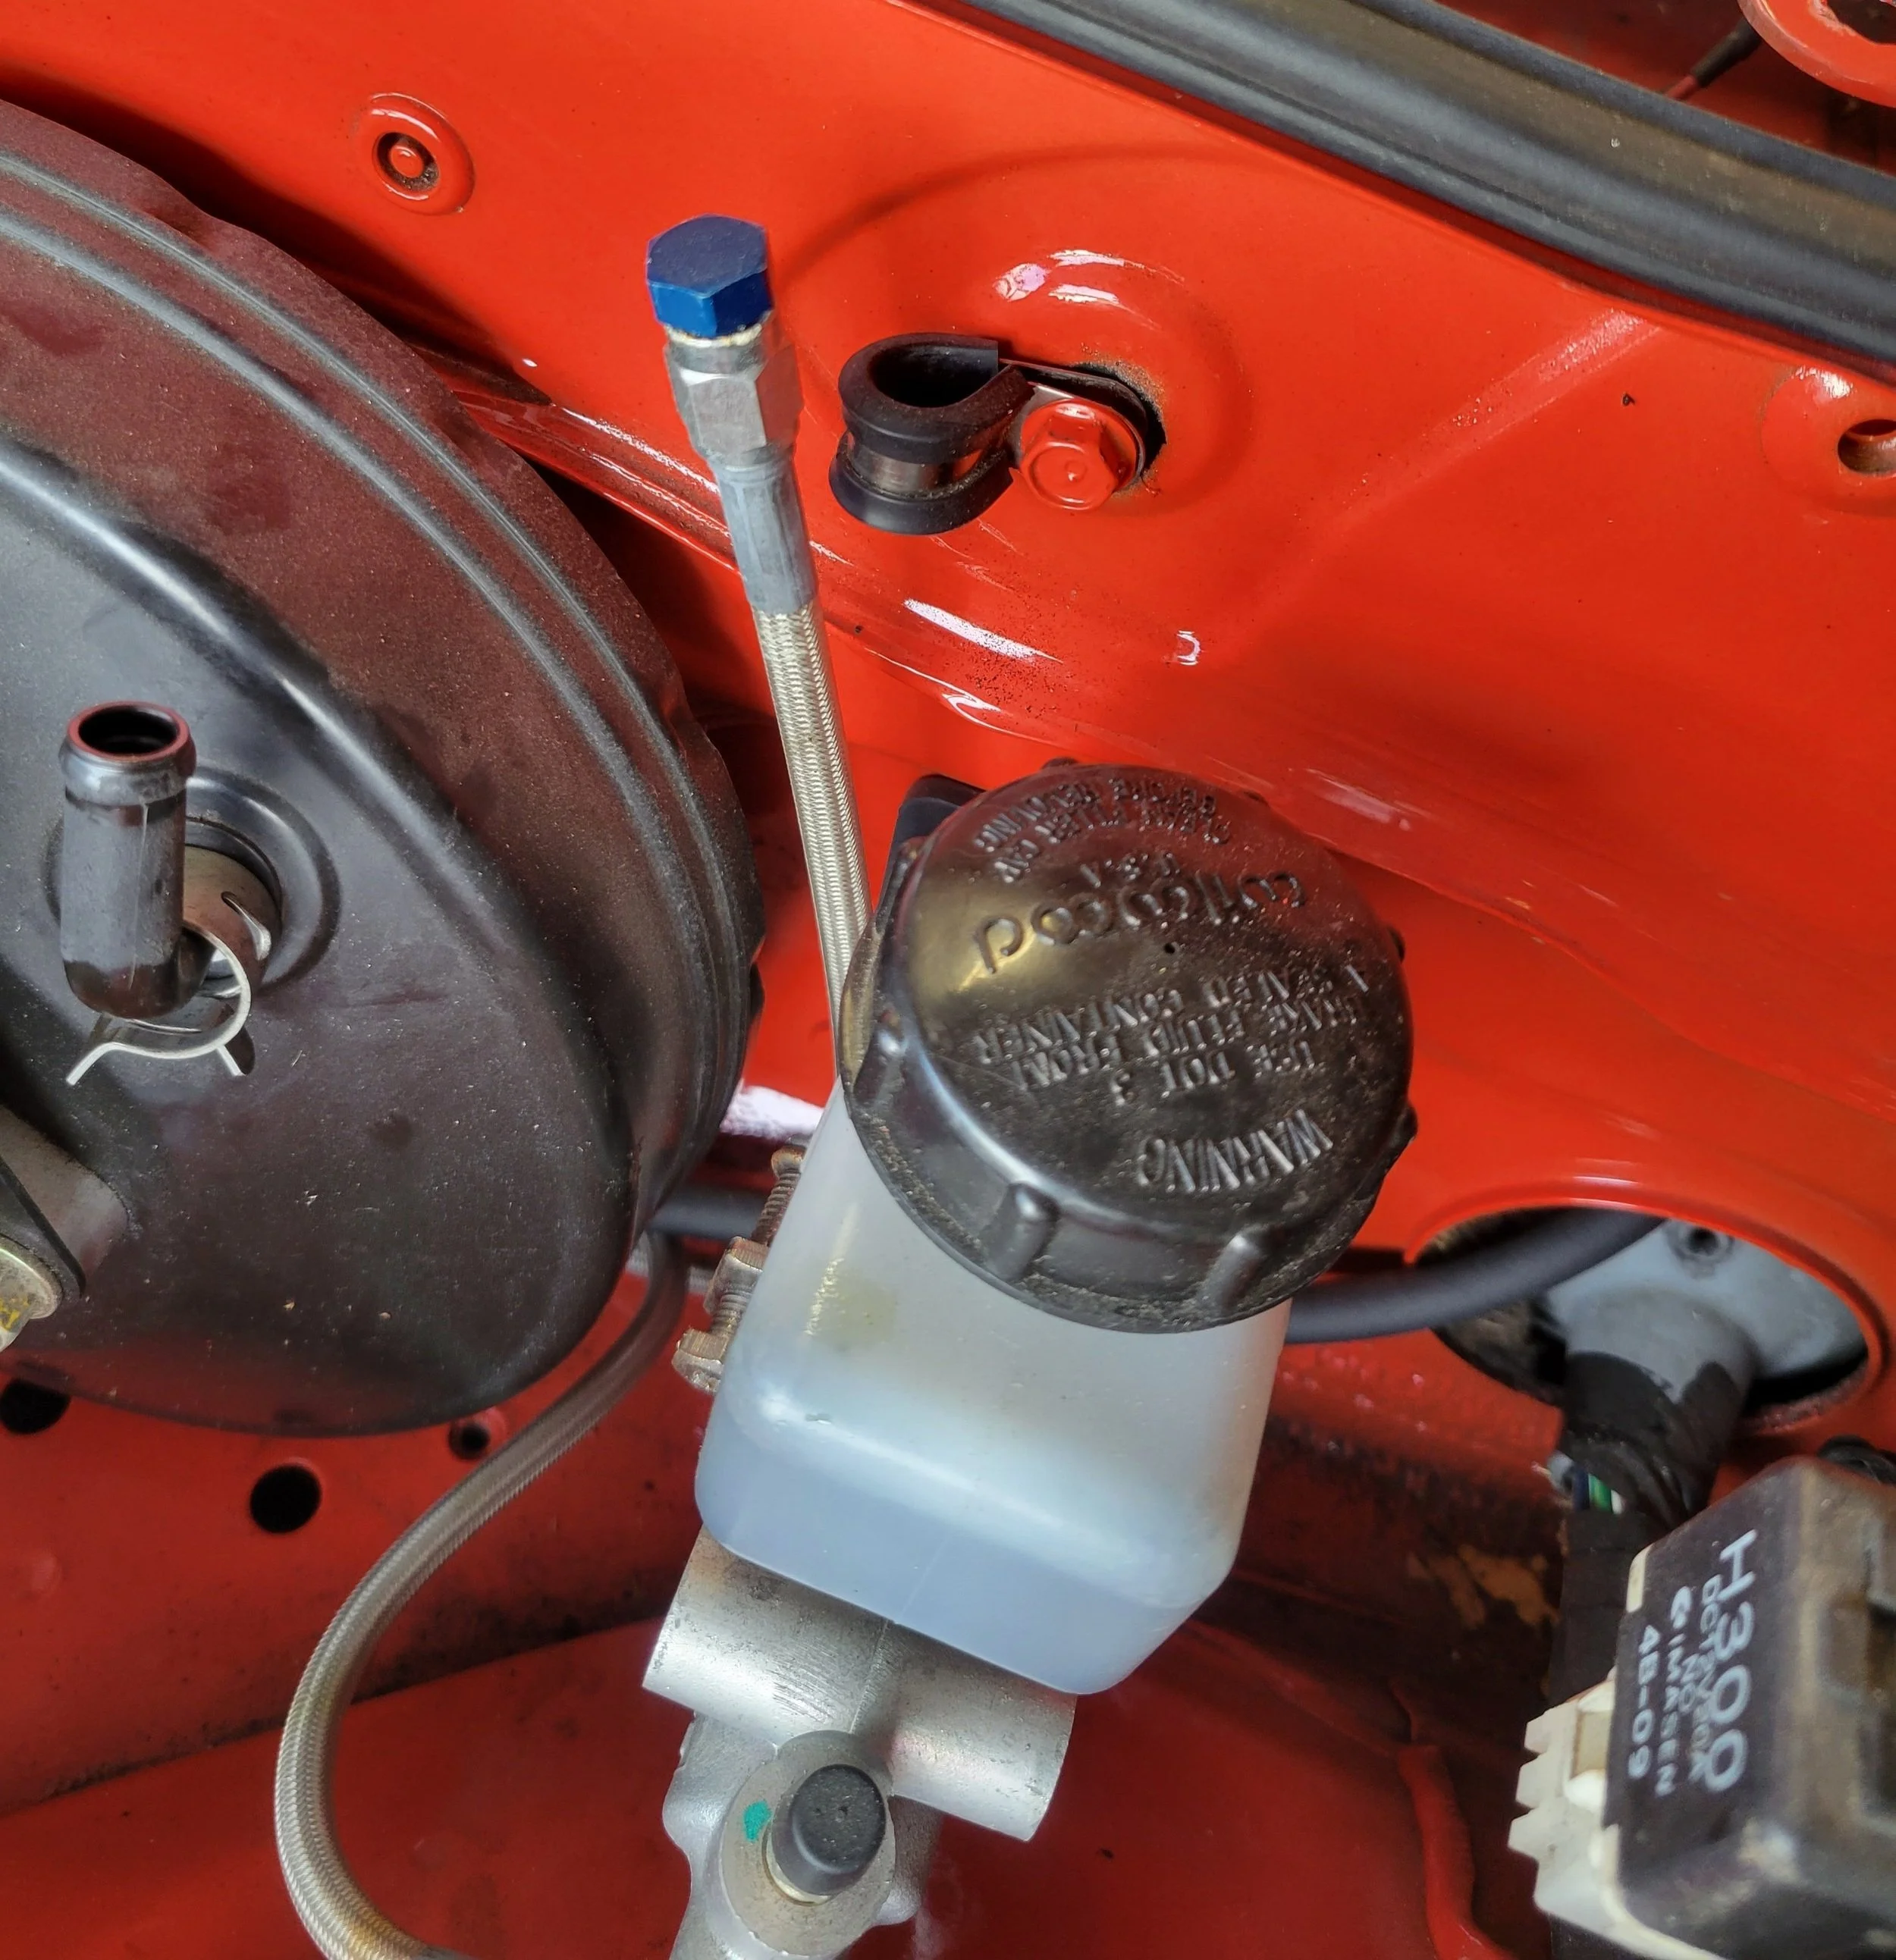
Front Brake Lines will need to be disconnected from chassis
don’t loose the retainer clips and wipe up all the fluid with plenty of brake clean and rags.
Clutch Lines (bleed and clutch) will stay with transmission
Need to remove the grommet holding the breather
Transmission breather line (attached to firewall)
Steering Rod; I wasn’t sure which side would come out so I removed the pin bolt on rack side
Various electrical connections at back of block
pair of grounds [photo below]
O2 sensors to each header
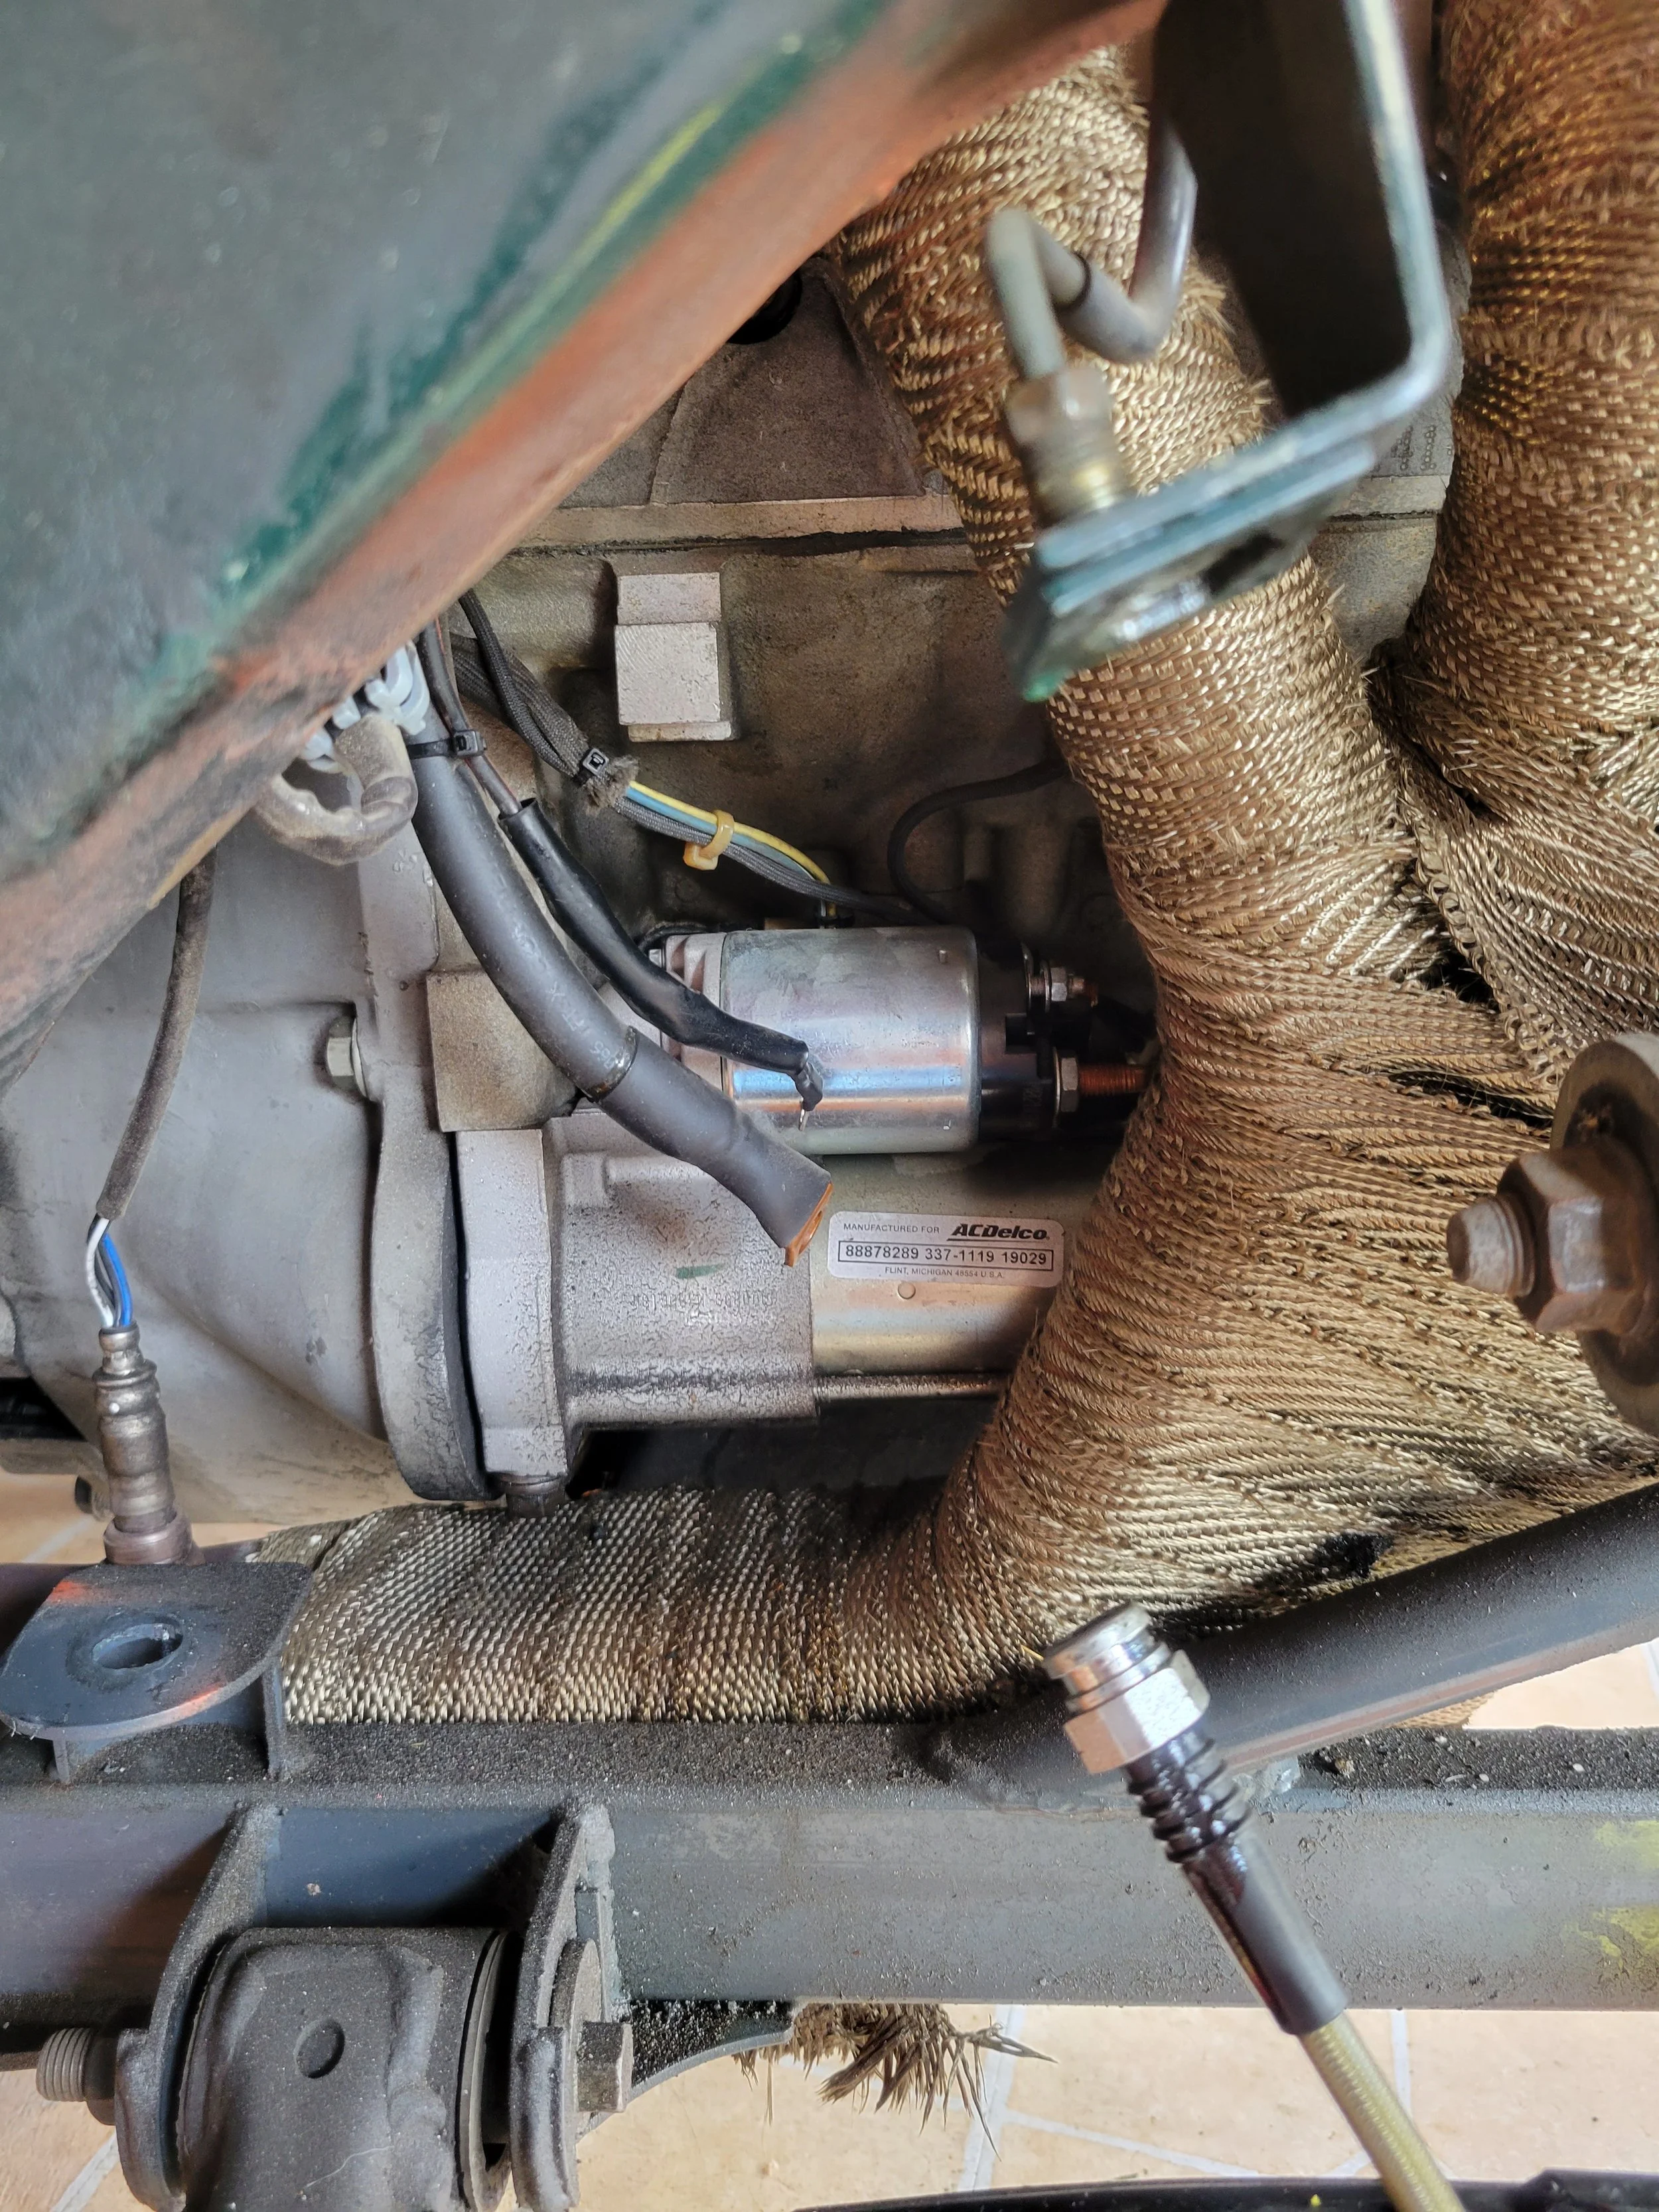
Starter [special approach mid drop - i.e wait]
Remote Oil Filter Lines (this won’t be a concern in future)

Rear Grounds
One is easily removable (13mm bolt), but there is a hidden second one on the drivers side of block.
It is best to wait until the engine is dropped a few inches to get a ratchet in on the 17mm bolt. the wiring harness has enough slack to accommodate this approach.
Exact same for the O2 plugs which are tucked (zip tied up snug) between the firewall and heads.
Remote Clutch Bleed
This little guy is a lifesaver when it comes time to bleed the clutch. Watch your fluid levels and it almost bleeds itself via gravity.
Best thing ever.
Before pulling the engine I just needed to remember to remove it and the line to the clutch. Tip to future self…. drain the reservoir via the Mityvac tool. (Same goes for the front brake fluid)
Getting rid of the brake and clutch fluids.

Angle of the Dangle
About 15” of extensions will get you access to the steering shaft bolt connecting it the steering rack. It took me awhile to realize this after trying to stuff my hand and a wrench up from the front. Save the time and do this…
WARNING - only applies to an LS3 powered Miata
My Final Trick
This was actually an accidental find. One of those why isn’t it moving anymore questions….
Turns out I planned it this way and left enough slack in the battery-to-start cable.
Dropping the subframe/engine/transmission as one piece by a few inches magically gives access to these connectors.
Another note for future me. I don’t need to disconnect the knock sensors, the have a plug on the back of block.
DO disconnect the crank sensor hiding behind the starter.


The rest as they say is easy
At this point the engine is attached to both the transmission and the front subframe. Pretty straightforward to deal with the transmission however the subframe requires a bit more thought.
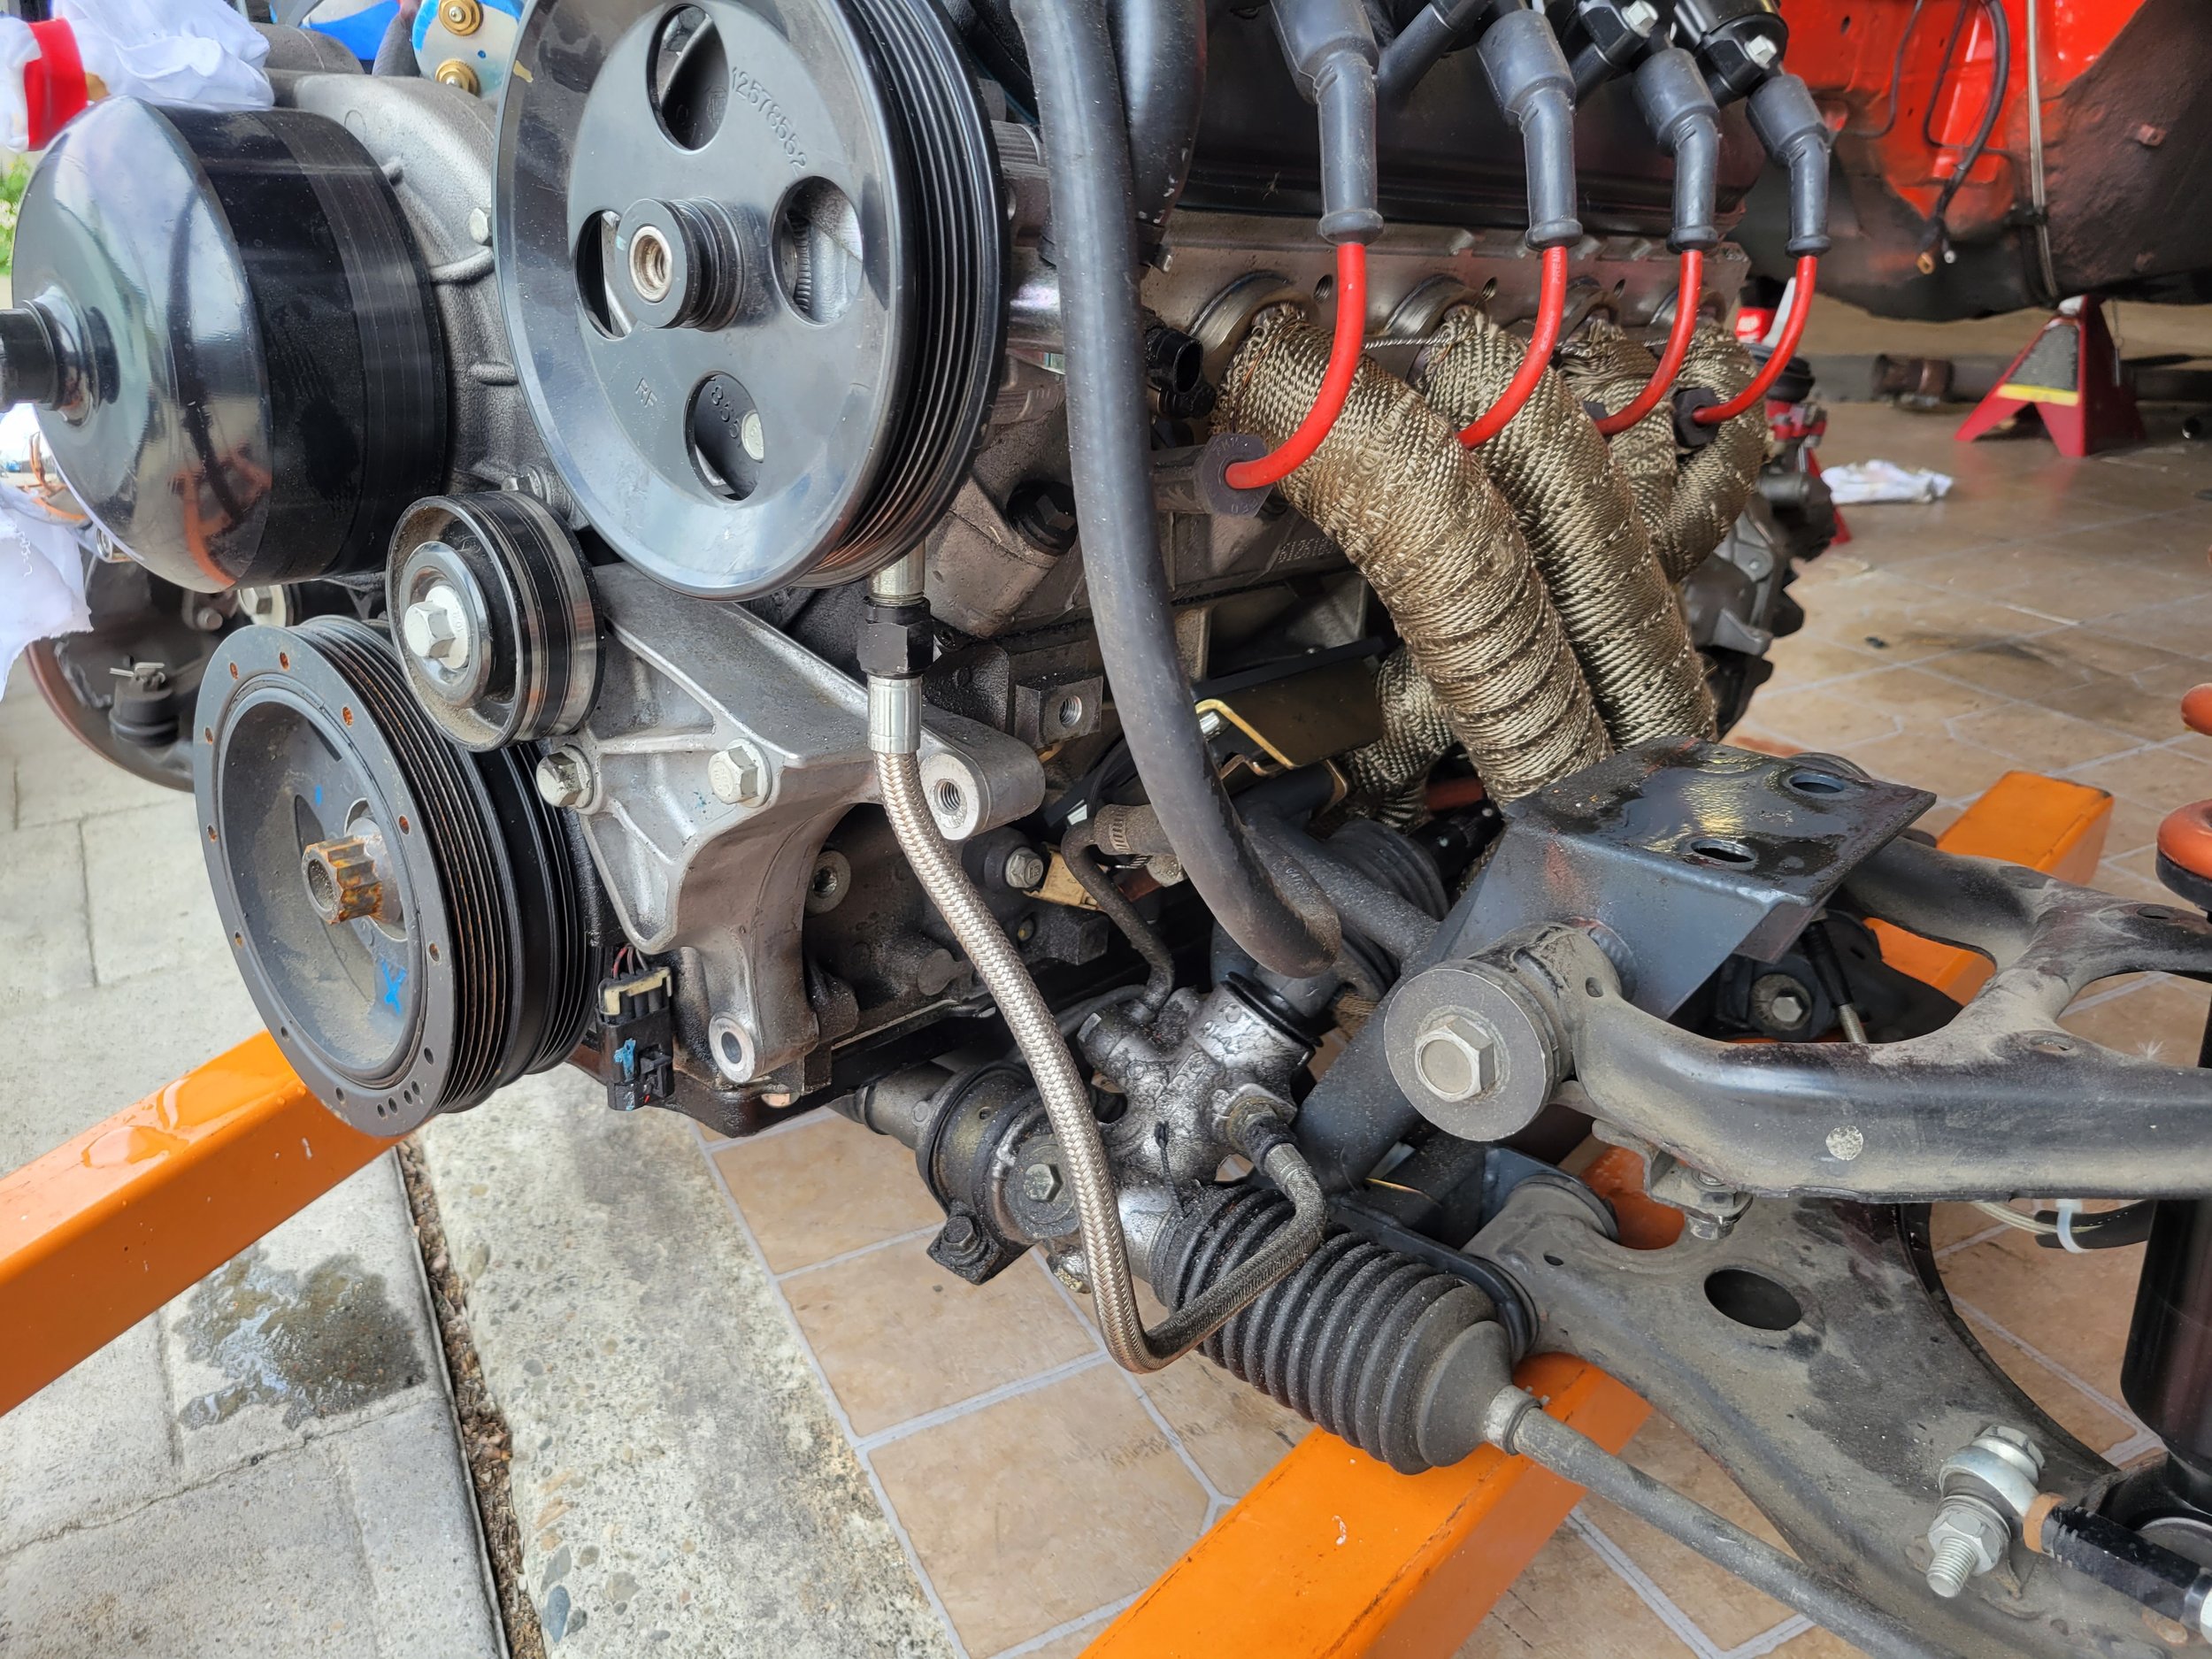
Power Steering Lines
They end up being a problem because they are another connection point to the subframe. So time for more oil spillage.
If you look carefully there is a missing alternator. That is on purpose, it must be removed to access the motor mount bolt. Similar for the other side, the A/C compressor (future home of oil pump) will need to be removed.

Leaving this a large as possible to better view. A wrench will fit down to the nut on the motor mount. Towards rear of engine between middle cylinders of header. Very tight squeeze for the 19mm wrench. I remember the nut install was very tricky…


Disassembled
Ta Da!
Around another four hours and I’m ready to start cleaning parts and swapping new shiny bits onto the engine. More to come next time!